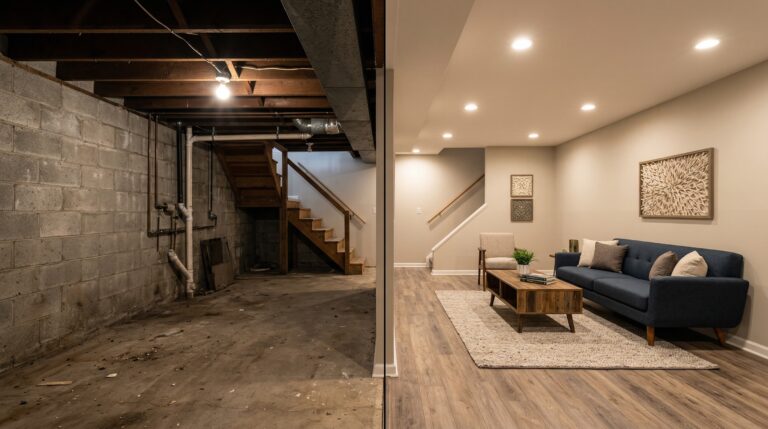
This is a question every Utah homeowner asks when staring at an unfinished basement and a $40,000+ quote from a contractor. Can you do it yourself and save money?
The honest answer: parts of it, yes. All of it? That depends on your skill level, available time, and tolerance for risk.
The Real Cost Comparison
Professional Basement Finishing
For a 1,200 sqft mid-range basement with one bathroom, one bedroom, and open living area:
– Total cost: $55,000-$75,000
– Timeline: 6-10 weeks
– Your time involved: 10-20 hours (decisions, meetings, checking in)
Full DIY
Same basement, same scope:
– Materials cost: $20,000-$35,000
– Tool purchases/rentals: $1,500-$4,000
– Sub-contractor costs you can’t avoid: $8,000-$15,000 (electrical, plumbing, concrete cutting)
– Total cost: $30,000-$54,000
– Timeline: 6-18 months (working evenings and weekends)
– Your time involved: 400-800+ hours
Hybrid Approach (Best Value)
Hire pros for the hard stuff, DIY the rest:
– Professional work: Framing, electrical, plumbing, HVAC, drywall hang/tape ($25,000-$40,000)
– DIY work: Painting, trim, flooring, basic fixtures ($5,000-$10,000)
– Total cost: $30,000-$50,000
– Timeline: 8-14 weeks
– Your time involved: 80-150 hours
What You Can Realistically DIY
Easy (Most Homeowners Can Do)
Painting — Time-consuming but straightforward. Buy quality paint, use proper primer on new drywall, and take your time taping. Savings: $2,000-$5,000.
Flooring (LVP/laminate) — Click-lock flooring is genuinely DIY-friendly. Watch a few YouTube videos, rent a miter saw, and budget a full weekend per 500 sqft. Savings: $2,000-$4,000.
Baseboards and trim — A miter saw and a nail gun (rent for $50/day) make this manageable. Inside corners are tricky, but cope cuts are a learnable skill. Savings: $1,000-$3,000.
Light fixture installation — If the electrical rough-in is done, installing recessed lights, switches, and outlets is basic. Turn off the breaker, follow the wiring diagram, done. Savings: $500-$1,500.
Bathroom vanity and toilet — Supply lines are already there. Setting a toilet and connecting a vanity are afternoon projects. Savings: $300-$800.
Moderate (Handy Homeowners)
Framing — Basement framing is simpler than structural framing. Walls are typically non-load-bearing partitions. You need a framing nailer, level, and basic carpentry skills. A 1,200 sqft basement takes 2-3 weekends. Savings: $3,000-$6,000.
Insulation — Fiberglass batts are cut-and-stuff. Boring, itchy work but not complicated. Get the right R-value, fill every cavity, and don’t compress the batts. Savings: $1,000-$2,500.
Tile work (floors) — Setting floor tile on a cement board substrate is doable with patience. Thin-set, spacers, and a tile saw (rent for $75/day). Walls and showers are significantly harder. Savings: $1,500-$3,000.
Difficult (Leave to Professionals)
Electrical rough-in — Utah requires permits and inspections. While homeowners can legally do their own electrical, mistakes cause fires. The risk-reward ratio is terrible. A licensed electrician rough-ins a whole basement in 2-3 days for $3,000-$6,000.
Plumbing — Breaking concrete, connecting to sewer lines, maintaining proper drain slopes — plumbing mistakes result in sewage problems or failed inspections. Hire a plumber. $3,000-$8,000 for bathroom plumbing.
Drywall finishing — Hanging drywall is DIY-possible. But taping, mudding, and sanding to a smooth finish is a genuine skill that takes years to develop. Bad drywall finishing is visible on every wall, every day, forever. Professional drywall finishing costs $4,000-$8,000 for a full basement and is worth every penny.
Concrete cutting for egress windows — Structural work that requires diamond saws and engineering knowledge. One wrong cut compromises your foundation. Always professional.
HVAC ductwork — Proper sizing, balancing, and connection requires HVAC knowledge. An undersized system makes the whole basement uncomfortable. Professional installation: $1,500-$4,000.
The Time Reality
This is where DIY math falls apart for most people.
A professional crew finishes a basement in 6-10 weeks working full-time. They have the tools, the experience, and the muscle memory. What takes a pro 2 hours takes a first-timer 8 hours — plus another 4 hours fixing mistakes.
DIY timeline reality check:
– Working evenings (2-3 hours) and weekends (8-10 hours): ~20 hours/week
– A basement requiring 500 labor hours: 25 weekends = 6 months minimum
– Add delays for material deliveries, inspection scheduling, and the inevitable “I need to research how to do this” pauses
– Realistic DIY completion: 8-18 months
During those months:
– Your basement is a construction zone
– Dust migrates to the upstairs (it always does)
– Your weekends and evenings are consumed
– Your significant other’s patience is tested
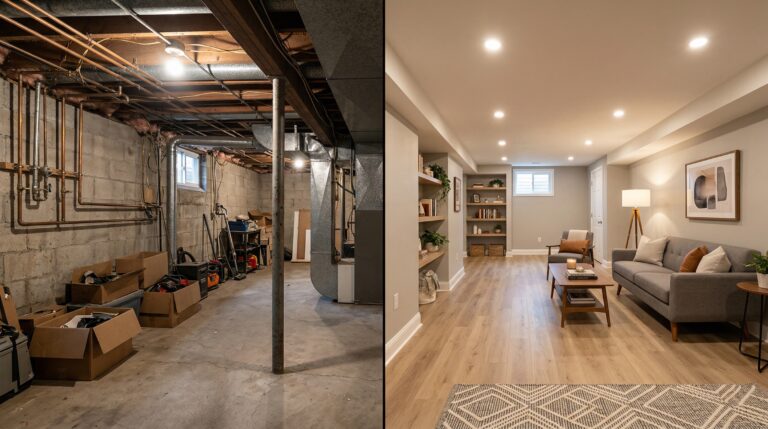
Quality Comparison
Be honest with yourself about this one.
Professional finish:
– Level 4-5 drywall finish (smooth, paint-ready)
– Square corners and plumb walls
– Even flooring transitions
– Professional-grade fixtures installed correctly
– Warranty on workmanship
Typical DIY finish:
– Level 2-3 drywall (visible imperfections in raking light)
– Corners that are “close enough”
– Flooring gaps at walls (hidden by baseboards, mostly)
– Fixtures that work but may not be installed optimally
– No warranty except manufacturer’s on materials
This isn’t a knock on DIYers — it’s an acknowledgment that skill develops with repetition, and most people finish exactly one basement in their lifetime.
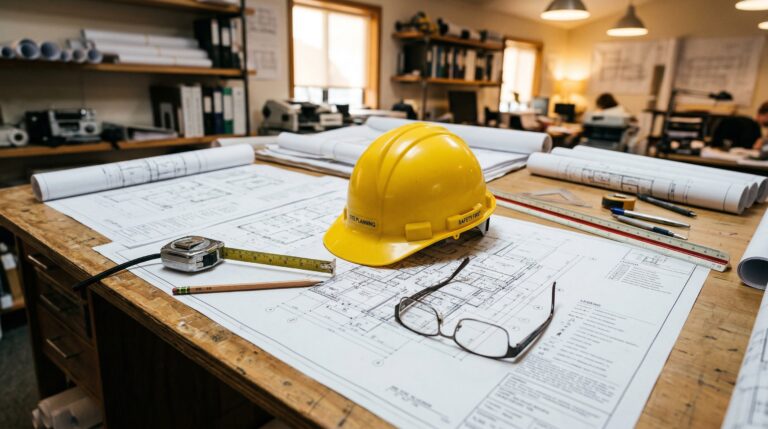
The Permit Factor
In Utah, you need permits for basement finishing. As a homeowner, you can pull your own permits — but:
– You’re responsible for scheduling inspections at the right time
– Failed inspections mean rework
– You need to understand what inspectors look for
– The permit process adds complexity to DIY timelines
Professional contractors manage permits daily. They know the local inspectors, understand the code, and rarely fail inspections because they’ve done it hundreds of times.
When DIY Makes Sense
✅ You’re genuinely handy and enjoy construction work
✅ You have realistic time expectations (6+ months, not “a few weekends”)
✅ Your budget truly can’t stretch to professional quotes
✅ You’re doing a simple project (one open room, no bathroom)
✅ You’re willing to hire pros for electrical, plumbing, and drywall finishing
✅ You have someone experienced to call when problems arise
When to Hire a Professional
✅ Your time is worth more than the labor savings
✅ The project includes a bathroom, kitchen, or complex layout
✅ You want the work done in 6-10 weeks, not 6-18 months
✅ Quality and finish matter to you
✅ You plan to sell the home within 5-10 years (appraisers can spot DIY)
✅ You want warranty coverage on the work
✅ Egress windows, extensive plumbing, or electrical is involved
The Best of Both Worlds: The Hybrid Approach
Most Utah homeowners get the best value from a hybrid approach:
Hire professionals for:
– Electrical rough-in and finish ($3,000-$6,000)
– Plumbing ($3,000-$8,000)
– Drywall hanging and finishing ($4,000-$8,000)
– HVAC extensions ($1,500-$4,000)
– Egress window installation ($3,000-$6,000)
DIY to save money on:
– Painting ($2,000-$5,000 saved)
– LVP flooring installation ($2,000-$4,000 saved)
– Baseboards and trim ($1,000-$3,000 saved)
– Light fixture and outlet installation ($500-$1,500 saved)
– Bathroom fixture installation ($300-$800 saved)
Total savings with hybrid approach: $6,000-$14,000 vs. full professional, with a timeline that’s manageable and a quality level that’s professional where it matters most.
Making Your Decision
Use our cost calculator to estimate the full project cost, then decide which parts you want to tackle yourself. When you’re ready for the professional portions, get a free quote or call 801-515-3473 — we’re happy to work alongside homeowners who want to do their part.
Ready to Start Your Basement Project?
Get a free, no-obligation quote from Utah's trusted basement finishing experts.
Get Free Quote