Finishing a basement involves dozens of steps in a specific order. Skip one or do them out of sequence and you create expensive problems. This checklist covers every phase — use it whether you’re hiring a contractor or managing the project yourself.
Phase 1: Pre-Construction Planning
Assessment & Testing
- [ ] Moisture test — Tape plastic sheeting to the floor and walls for 48 hours. Any moisture underneath means you have issues to address first
- [ ] Radon test — Buy a short-term test kit ($15) or hire a professional ($150). Parts of Utah, especially along the Wasatch Front, have elevated levels
- [ ] Measure and document — Total square footage, ceiling height at multiple points, location of existing plumbing/HVAC/electrical, support columns, and obstructions
- [ ] Check existing rough-ins — Many Utah homes have pre-plumbed drains and supply lines. Find them before designing your layout
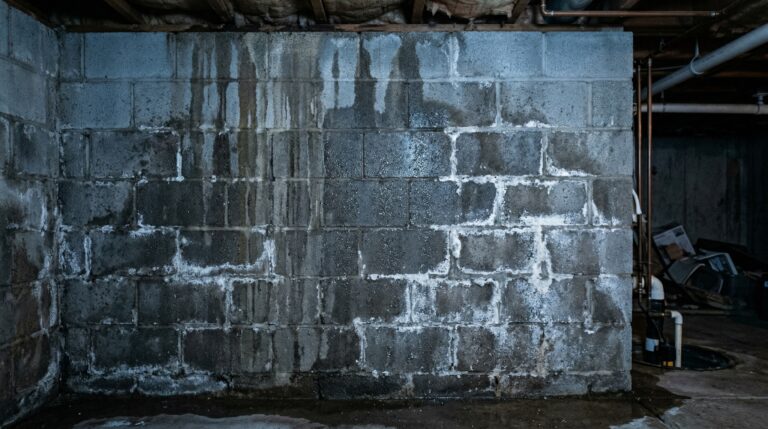
- [ ] Inspect the foundation — Look for cracks, efflorescence (white mineral deposits), and water staining. Address any structural issues before finishing
Design & Planning
- [ ] Create a floor plan — Room layout including all rooms, hallways, doors, and storage. Consider traffic flow and how spaces connect
- [ ] Plan electrical layout — Outlet locations, switch locations, lighting plan, dedicated circuits for high-draw items (heaters, mini kitchen appliances)
- [ ] Plan plumbing layout — Bathroom locations near existing rough-ins save thousands. Wet bars and kitchenettes need supply and drain lines
- [ ] Plan HVAC extensions — Where will supply and return vents go? Is the existing furnace sized for the additional space?
- [ ] Select finish level and materials — Flooring, paint colors, fixtures, lighting. Having these decided before construction starts prevents expensive delays
- [ ] Get 2-3 contractor quotes — If hiring out. Compare scope of work, not just price. Ask for references from Utah projects
- [ ] Set a realistic budget — Use our cost calculator for a starting estimate, then add 10-15% contingency
Permits & Approvals
- [ ] Check local requirements — Contact your city’s building department. All Utah cities require permits for basement finishing
- [ ] Submit permit application — Include floor plan, electrical plan, and plumbing plan. Budget 1-3 weeks for approval
- [ ] HOA approval — If applicable, submit plans to your HOA. Some have restrictions on exterior changes (egress windows)
- [ ] Schedule inspections — Know which inspections are required and when. Typically: framing, electrical rough-in, plumbing rough-in, insulation, and final
Phase 2: Pre-Drywall Construction
Do these in order. Each step depends on the previous one.
Waterproofing & Foundation
- [ ] Repair foundation cracks — Epoxy injection or hydraulic cement, depending on crack type
- [ ] Install moisture barrier — On exterior walls if not already present. Dimple board or sealed poly sheeting
- [ ] Install interior drain system — If moisture testing revealed issues. French drain along the footing perimeter connecting to a sump pump
- [ ] Address radon — If testing showed levels above 4 pCi/L, install a radon mitigation system (sub-slab depressurization)
Framing
- [ ] Lay out walls — Snap chalk lines on the floor marking all wall locations
- [ ] Frame exterior walls — Pressure-treated bottom plates on concrete. Leave gap from foundation wall for moisture management
- [ ] Frame interior walls — Standard lumber for walls not touching concrete
- [ ] Frame soffits and bulkheads — Box in ductwork, pipes, and beams that can’t be moved
- [ ] Install door frames and headers — Size headers appropriately for load-bearing vs. partition walls
- [ ] Build closets — Bedroom closets must meet minimum depth requirements
- [ ] Frame bathroom walls — Use moisture-resistant bottom plates in wet areas
Electrical Rough-In
- [ ] Run wire for all circuits — 15-amp for lighting, 20-amp for outlets, dedicated circuits for appliances
- [ ] Install outlet boxes — Per code spacing (every 12 feet along walls, within 6 feet of doorways)
- [ ] Install switch boxes — At every room entrance, at top and bottom of stairs
- [ ] Run low-voltage wiring — Ethernet, coax for TV, speaker wire, security system wire
- [ ] Install recessed light housings — Before insulation goes in
- [ ] Install bathroom fan housing — Vented to exterior, not just into the attic
- [ ] Wire smoke and CO detectors — Required in every bedroom, outside sleeping areas, and near furnace
Plumbing Rough-In
- [ ] Run supply lines — Hot and cold to each fixture location
- [ ] Install drain lines — Connect to existing sewer lines. Proper slope is critical
- [ ] Set toilet flange — At correct height for your finished floor level
- [ ] Install shower/tub drain — Before the concrete patch if breaking the slab
- [ ] Pressure test — All supply lines must hold pressure before being closed in
HVAC
- [ ] Extend ductwork — Supply and return runs to each room
- [ ] Install dampers — To balance airflow between basement and upper floors
- [ ] Verify capacity — HVAC system must handle the additional square footage. May need a larger blower motor or supplemental unit
- [ ] Install bathroom exhaust fan — Duct to exterior. Minimum 50 CFM for small baths, 1 CFM per sqft for larger
Inspection Checkpoint
- [ ] Schedule and pass rough-in inspection — Framing, electrical, plumbing, and mechanical all reviewed before closing walls. This is where inspectors catch issues. Fix anything flagged before proceeding
Phase 3: Insulation & Drywall
Insulation
- [ ] Insulate exterior walls — Utah energy code requires specific R-values. Rigid foam, fiberglass batts, or spray foam depending on wall assembly
- [ ] Insulate rim joist/band joist — Often missed but a major source of heat loss. Spray foam or cut-and-cobble rigid foam
- [ ] Sound insulation — Fiberglass batts in the ceiling between basement and main floor if noise transfer is a concern. Required for home theaters
- [ ] Insulate plumbing lines — Prevent condensation on cold water pipes, which causes dripping onto new drywall
Drywall
- [ ] Hang drywall — 1/2″ standard for most walls and ceilings. Moisture-resistant (green board or purple board) in bathrooms
- [ ] Tape and mud joints — Multiple coats with sanding between. This is where quality shows
- [ ] Apply texture — Orange peel, knockdown, or smooth. Match the upstairs texture for consistency
- [ ] Prime walls — PVA primer on new drywall before paint
Inspection Checkpoint
- [ ] Schedule and pass insulation inspection — Required before drywall in most Utah cities
Phase 4: Finish Work
Flooring
- [ ] Install flooring — LVP, engineered hardwood, tile, or carpet. Choose appropriate materials for below-grade application
- [ ] Install transitions — Between rooms with different flooring types
- [ ] Install baseboards — After flooring is complete
Paint
- [ ] Paint walls — Two coats of finish paint. Use quality basement-rated paint with mildew resistance
- [ ] Paint ceiling — Flat white for maximum light reflection
- [ ] Paint trim — Semi-gloss for durability and easy cleaning
Fixtures & Trim
- [ ] Install interior doors — Pre-hung doors are easiest. Match style to upstairs doors
- [ ] Install door hardware — Knobs, hinges, stops
- [ ] Install trim — Window casing, crown molding (if applicable), chair rail
- [ ] Install electrical devices — Outlets, switches, and cover plates
- [ ] Install light fixtures — Recessed lights, pendants, sconces
- [ ] Install bathroom fixtures — Toilet, vanity, faucets, mirror, shower fixtures, towel bars
- [ ] Install kitchen/bar fixtures — Sink, faucet, cabinets, countertop, appliances
Egress Windows
- [ ] Cut foundation opening — Professional concrete cutting required
- [ ] Install window well — Corrugated steel, stone, or prefabricated well
- [ ] Install window — Sized to meet egress code (5.7 sqft minimum opening)
- [ ] Install window well cover — Keeps out debris and rain while allowing emergency exit
- [ ] Grade around well — Ensure water drains away from the well, not into it
Phase 5: Final Steps
- [ ] Final cleaning — Construction dust gets everywhere. Professional post-construction cleaning is worth it
- [ ] Touch-up paint — Inevitable scuffs and marks from installation work
- [ ] Final inspection — Schedule with your city. Inspector verifies all work meets code
- [ ] Certificate of occupancy — Some cities require this, especially for ADUs or rental units
- [ ] HVAC balancing — Adjust dampers so basement temperature is comfortable without making upstairs too cold or hot
- [ ] Test everything — Every outlet, every light, every faucet, every drain. Run the shower for 10 minutes and check for leaks
- [ ] Document warranties — Collect warranty info for all materials and workmanship
Timeline Expectations
| Phase | Duration |
|---|---|
| Planning & permits | 2-4 weeks |
| Framing | 3-5 days |
| Electrical/plumbing rough-in | 3-5 days |
| Inspection + insulation | 1-2 weeks |
| Drywall (hang, tape, texture) | 1-2 weeks |
| Finish work | 2-4 weeks |
| Total | 6-12 weeks |
Ready to Start?
Print this checklist and use it to track your project. Whether you’re hiring a professional basement finishing contractor or managing subs yourself, knowing the process prevents surprises.
Get a free quote to start your basement project, or call 801-515-3473 to discuss your plans.
Ready to Start Your Basement Project?
Get a free, no-obligation quote from Utah's trusted basement finishing experts.
Get Free Quote