The short answer: 6-12 weeks for a professional build of a typical Utah basement. But “typical” varies a lot, and every project has phases that move fast and phases that crawl.
Here’s the real timeline, broken down by phase, so you know exactly what to expect.
Phase-by-Phase Timeline
Phase 1: Planning & Permits (2-4 Weeks)
What happens: Design finalization, material selection, permit application, and plan review.
| Task | Duration |
|---|---|
| Design meetings & floor plan | 3-5 days |
| Material/finish selections | 3-7 days |
| Permit application submission | 1 day |
| City plan review | 5-15 business days |
| Permit revisions (if needed) | 3-7 days |
What slows this down: Indecision on design, complex projects (ADUs need planning department review, not just building), and backlogs at the building department. Lehi, Eagle Mountain, and other fast-growing Utah cities sometimes have longer review times simply due to volume.
What speeds this up: Having your design and material choices finalized before the contractor starts the permit application. Know what you want before you start.
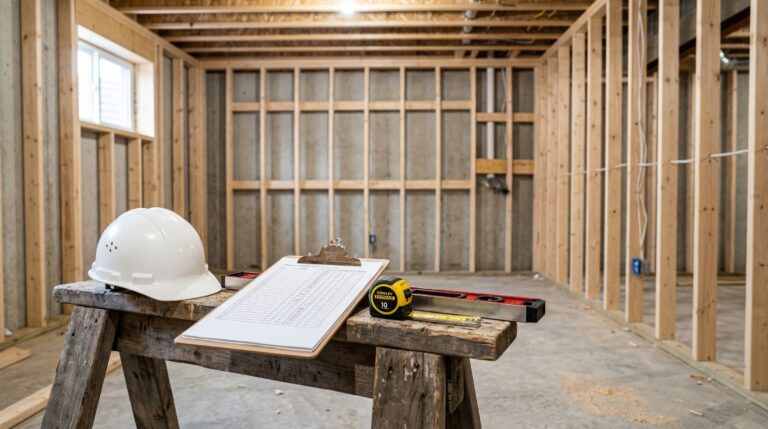
Phase 2: Rough Construction (2-3 Weeks)
What happens: The skeleton of your basement goes in — framing, electrical wiring, plumbing pipes, and HVAC ductwork.
| Task | Duration |
|---|---|
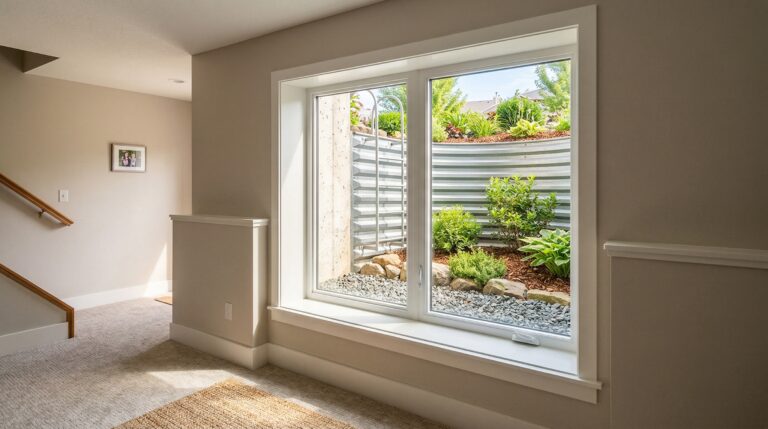
| Egress window cutting & install | 2-3 days |
| Framing (walls, soffits, closets) | 3-5 days |
| Electrical rough-in | 2-3 days |
| Plumbing rough-in | 2-3 days |
| HVAC ductwork | 1-2 days |
| Rough-in inspection scheduling | 1-5 days (wait time) |
| Rough-in inspection | 1 day |
What slows this down: Failed inspections (fix issues + reschedule, adding 3-7 days). Coordination between trades — the electrician can’t start until framing is done, the plumber needs the electrician finished, etc. A good contractor sequences these trades to overlap where possible.
What speeds this up: Experienced trades who’ve worked together before. Pre-existing plumbing and electrical rough-ins from the builder. Clean, unobstructed basement space.
Phase 3: Insulation & Drywall (1.5-2.5 Weeks)
What happens: Walls get insulated, then drywall goes up, gets taped, mudded, textured, and primed.
| Task | Duration |
|---|---|
| Insulation installation | 1-2 days |
| Insulation inspection | 1-3 days (wait time) |
| Drywall hanging | 2-3 days |
| Taping (first coat) | 1 day |
| Drying time + second coat | 1-2 days |
| Drying time + third coat + sanding | 1-2 days |
| Texturing | 1 day |
| Priming | 1 day |
What slows this down: Drywall mud needs time to dry between coats — you can’t rush chemistry. Humidity and temperature affect drying time. Winter basements are naturally cooler, which slows drying. Running a heater and dehumidifier helps.
What speeds this up: Heated, ventilated workspace. An experienced drywall crew who can hang a full basement in a day.
Phase 4: Finish Work (2-4 Weeks)
What happens: Everything visible — paint, flooring, fixtures, trim, cabinets, countertops, and detail work.
| Task | Duration |
|---|---|
| Painting (walls + ceiling) | 3-5 days |
| Flooring installation | 2-4 days |
| Door installation and hardware | 1-2 days |
| Trim and baseboards | 2-3 days |
| Bathroom tile and fixtures | 3-5 days |
| Wet bar cabinets, counters, fixtures | 2-4 days |
| Electrical finish (outlets, switches, fixtures) | 1-2 days |
| Touch-up painting | 1 day |
| Final cleaning | 1 day |
What slows this down: Custom countertops (granite/quartz fabrication takes 2-3 weeks from template to install). Backordered materials — a specific tile, fixture, or flooring that’s out of stock adds weeks. Special-order doors or hardware.
What speeds this up: Ordering all materials and fixtures before construction starts. Having backups selected in case primary choices are unavailable. Using in-stock materials from local suppliers.
Phase 5: Final Inspection & Completion (1-2 Weeks)
| Task | Duration |
|---|---|
| Final punch list | 1-2 days |
| Schedule final inspection | 1-5 days (wait time) |
| Final inspection | 1 day |
| Any corrections + re-inspection | 0-5 days |
| HVAC balancing | 1 day |
| Final walkthrough with homeowner | 1 day |
Total Timeline Summary
| Project Scope | Professional Timeline | DIY Timeline |
|---|---|---|
| Simple (open room, no plumbing) | 4-6 weeks | 3-6 months |
| Standard (1 bath, 1 bedroom, living area) | 6-10 weeks | 6-12 months |
| Complex (2 baths, kitchen, theater, multiple rooms) | 10-14 weeks | 12-24 months |
| Full ADU/apartment | 12-16 weeks | Not recommended DIY |
What Causes Delays
Controllable Delays
- Slow material decisions: Picking tile, flooring, and fixtures during construction instead of before
- Design changes mid-project: Moving a wall after framing costs time and money
- Material availability: Not ordering custom items early enough
- Payment delays: Contractors may pause work if draw payments are late
Uncontrollable Delays
- Inspection scheduling: Some Utah cities have 3-5 day wait times for inspections
- Failed inspections: Fix + reschedule adds a week minimum
- Weather: Affects egress window excavation and exterior work
- Supply chain issues: Material shortages or backorders
- Subcontractor scheduling: The plumber’s next opening may be in 2 weeks
Seasonal Timing in Utah
Best time to start: Fall (September-November)
– Contractors are finishing summer exterior projects and have availability
– Indoor work isn’t affected by winter weather
– Project completes by the holidays or early new year
– You enjoy the new space all winter
Busiest time: Spring (March-May)
– Everyone wants their basement done before summer
– Longer wait times for contractor availability and inspections
– May wait 2-4 weeks just to get on a contractor’s schedule
Slowest time: Winter (December-February)
– Best availability and potentially best pricing
– Egress window work is harder in frozen ground (but still doable)
– You may negotiate 5-10% savings on labor
Tips to Keep Your Project on Schedule
- Make all design and material selections before work starts — This single step prevents more delays than anything else
- Order long-lead items immediately — Countertops, custom cabinets, and specialty fixtures should be ordered when the permit is submitted
- Be available for decisions — When your contractor calls with a question, answer quickly. A 3-day delay on a decision delays the whole project
- Clear the basement before day one — An empty, accessible basement lets work start immediately
- Discuss the schedule upfront — Get a written timeline with milestones from your contractor
- Don’t add scope mid-project — “While you’re at it, can you also…” is the most expensive phrase in construction
What a Realistic Schedule Looks Like
For a 1,200 sqft basement with one bathroom, one bedroom, wet bar, and open living area:
Week 1-2: Permits submitted, materials ordered
Week 3: Egress window installed, framing begins
Week 4: Framing complete, electrical and plumbing rough-in
Week 5: Rough-in inspection, insulation installed, insulation inspection
Week 6: Drywall hung, first mud coat
Week 7: Drywall finishing, texture, prime
Week 8: Paint, flooring begins
Week 9: Flooring complete, trim, doors, bathroom tile
Week 10: Fixtures, bar install, electrical finish
Week 11: Touch-up, cleaning, final inspection
Week 12: Punch list, walkthrough, move in
Ready to Get Started?
The sooner you start planning, the sooner you’re enjoying your finished basement. Get a free quote to begin your project timeline, or call 801-515-3473 to discuss scheduling.
Use our cost calculator to estimate your project budget alongside the timeline.
Ready to Start Your Basement Project?
Get a free, no-obligation quote from Utah's trusted basement finishing experts.
Get Free Quote