
A homeowner stands in a cool basement with a tape measure and calls the project a basement kitchen. That phrase covers four different rooms. It can mean a sink for drinks, a short counter for snacks, a full place to cook, or a kitchen inside a separate living suite. The cabinets come last. The use comes first.
Stairs, ceiling height, the furnace, and a usable way out decide more than any cabinet catalog. In Salt Lake, Utah, Davis, and Weber counties, the city also decides whether the work is a finish, a remodel, or something closer to a second dwelling. Write the use down before anyone draws a layout.
Choose the Kitchen Type Before You Draw the Layout
Most basement kitchen design starts with a mismatch. The household says kitchen, and the room could be any of four types, from a small bar up to a layout meant for separate living.
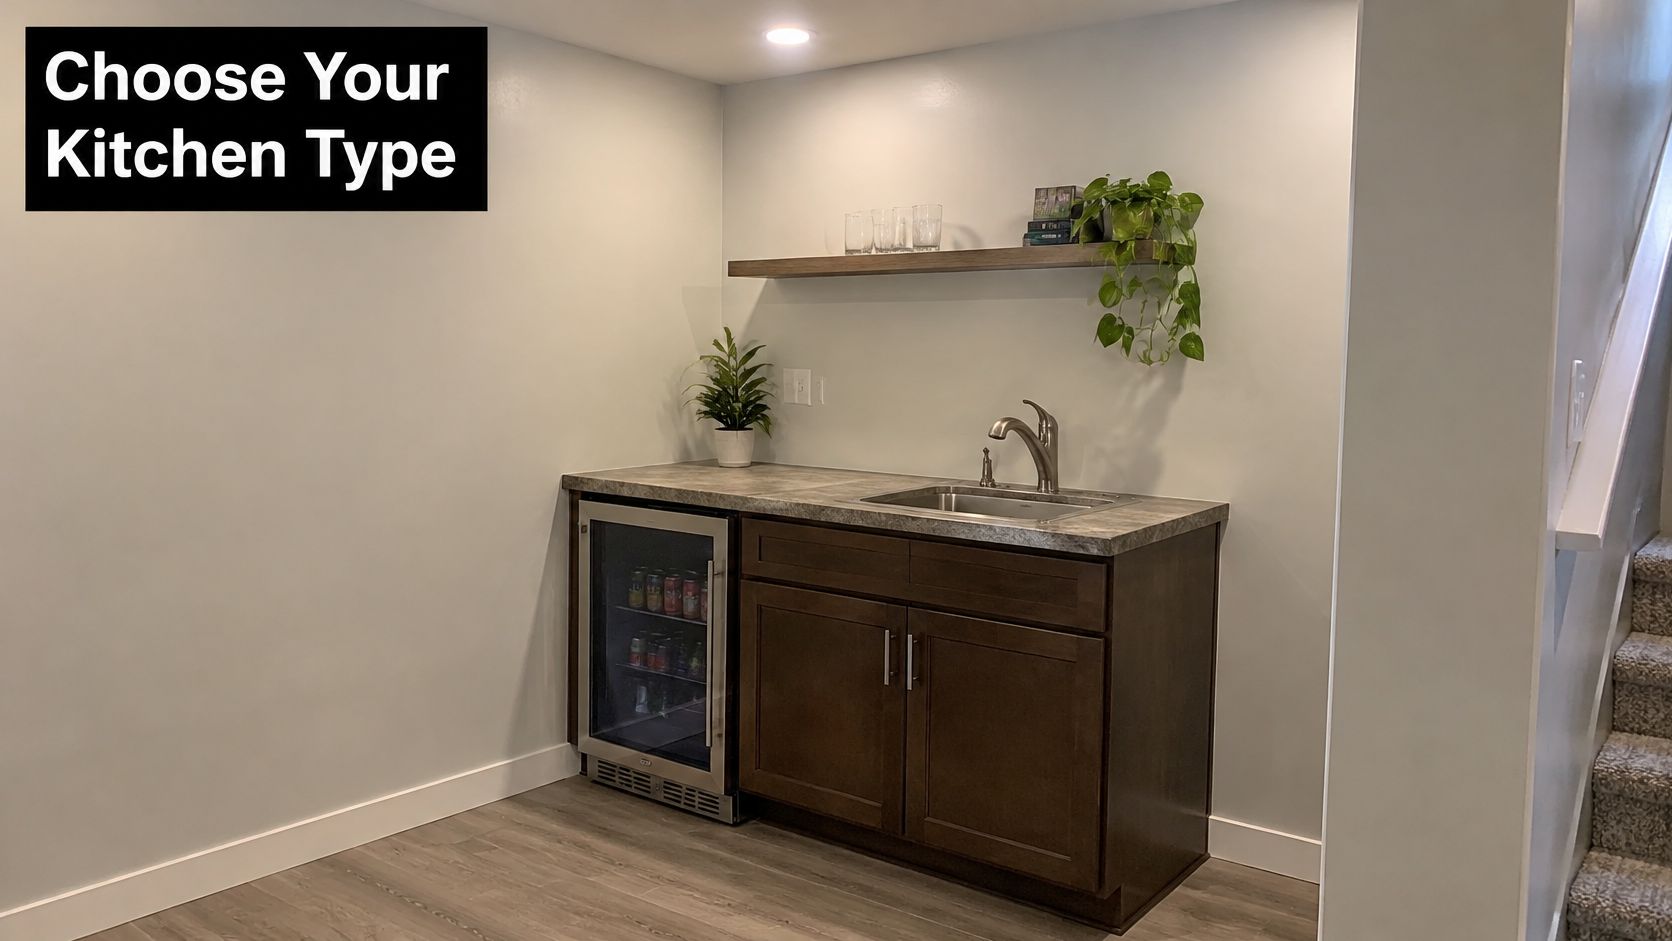
Wet bar. A sink, an under-counter refrigerator or ice maker, and cabinets. There is no range. The open question is whether anyone cooks at all, and whether the bar needs its own circuit.
Kitchenette. A single-bowl sink, an under-counter refrigerator, a microwave, and a short run of base cabinets. Ask whether anyone will prepare full meals, and whether the room opens into the main home or has its own entrance.
Full basement kitchen. A full-size sink, a range or cooktop with a hood that vents outside, a dishwasher, and a full-size refrigerator. Ventilation, circuits, and the permit scope grow with that equipment.
ADU-style kitchen. Full cooking equipment sits inside a layout that also has sleeping space and a bathroom. The question is whether the property meets local dwelling, rental, and egress rules.
| Kitchen type | Typical equipment | Main planning question |
|---|---|---|
| Wet bar | Sink, under-counter refrigerator or ice maker, cabinets, no range | Is cooking planned at all, and does the bar need its own electrical circuit? |
| Kitchenette | Single-bowl sink, under-counter refrigerator, microwave, short run of base cabinets | Will anyone prepare full meals here, and does the room connect to the main home or a separate entrance? |
| Full basement kitchen | Full-size sink, range or cooktop with exterior-vented hood, dishwasher, full-size refrigerator | Which ventilation route, circuits and permit scope does the cooking equipment require? |
| ADU-style kitchen | Full cooking equipment within a layout for separate living, sleeping and bathroom use | Does the property meet local dwelling-unit, rental and egress rules? |
Three questions that sort the type
- Who cooks, and how often? Daily meals point toward a full kitchen. Occasional snacks fit a kitchenette or a wet bar.
- How does the room connect? An open stair into the main house is a different use from a separate entrance.
- Will anyone rent the space or sleep there? Rental and sleeping plans change the approval path even when the counter is short.
A smaller kitchen is not automatically a lower-regulation project, because access and occupancy often matter more than square footage.
Finishing unfinished space and remodeling an already finished basement follow different review paths. Utah Basement Finishing's basement kitchens service is the place for the broad build scope. This article stays on the planning decisions behind that work, including how to plan a basement wet bar when cooking is not part of the use.
Write the kitchen type and the intended use on one sheet before any cabinet is drawn.
Approvals for Kitchens, Kitchenettes and Basement Dwellings
A small counter still triggers review when walls, plumbing, or occupancy change. Size is not the test. The approval path turns on what the equipment does and who will use the room.
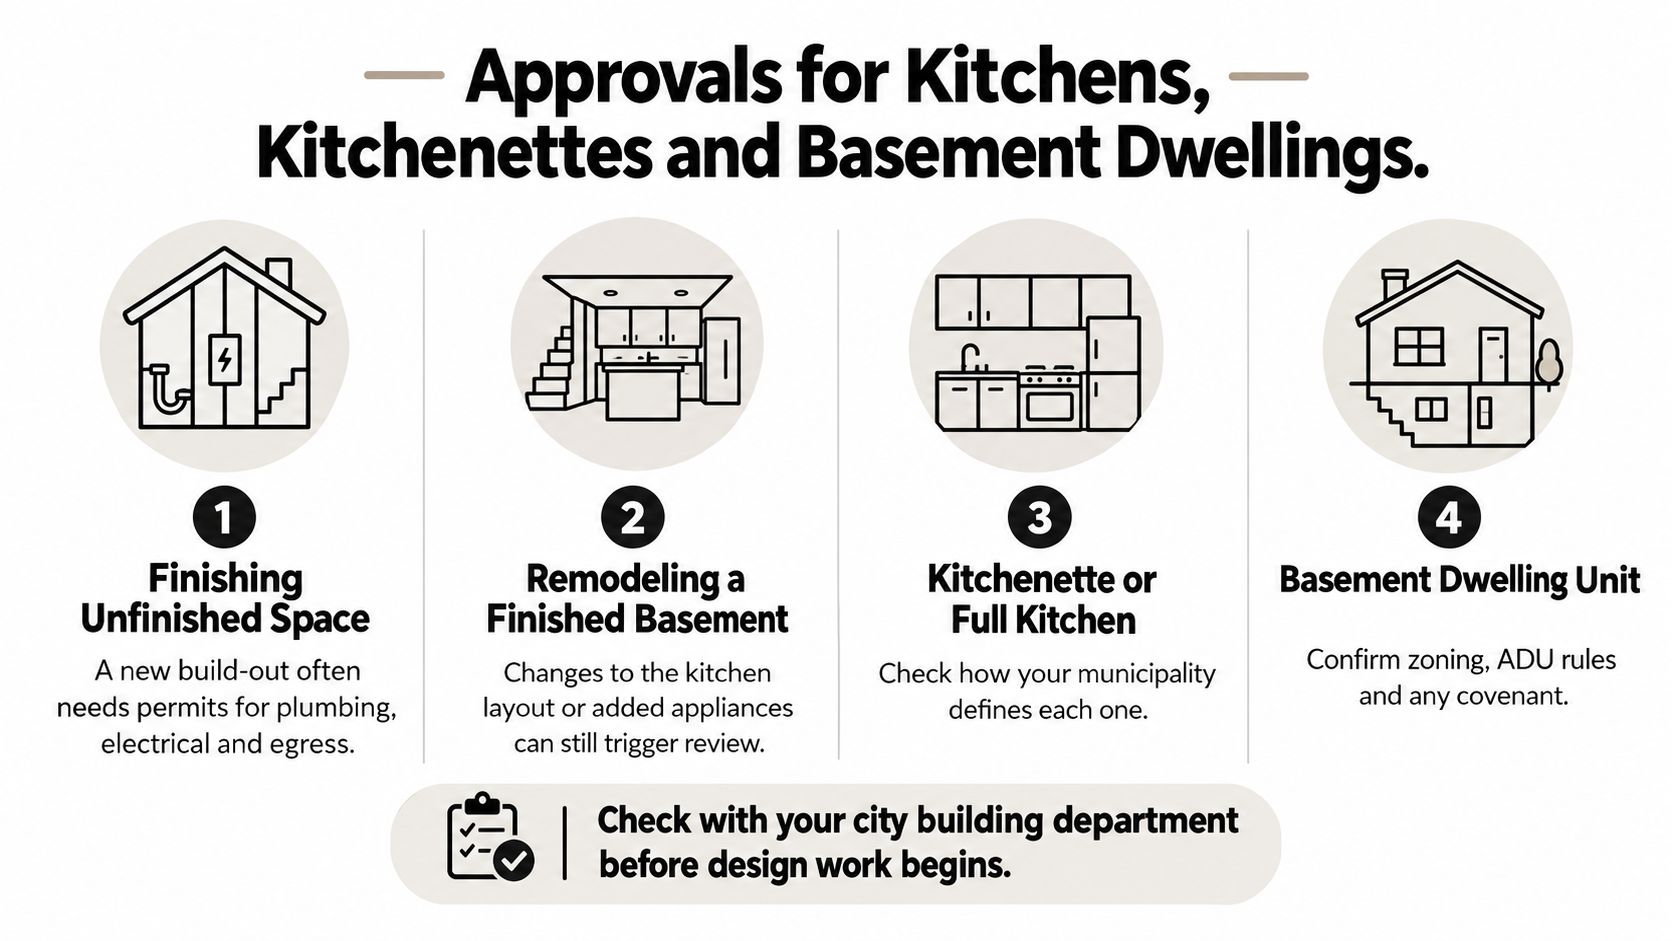
Wasatch Front cities do not share one kitchen rule. Draper's accessory dwelling unit guidance requires permits for basement finishes, remodeling, and second kitchens, and it states that a detached ADU requires an ADU permit before it can be rented. The same guidance notes that Payson requires an ADU permit or a recorded certificate for homes with a basement exterior entrance or a second kitchen, and that Davis County lists basement finishes and work on plumbing, electrical, mechanical, or gas systems among projects requiring permits.
What the city decides
A sink and a range set the equipment list. Zoning, egress, fire separation, ventilation, and occupancy rules decide whether the basement counts as a legal dwelling. A kitchen that stays open to the main house can still need a permit. A kitchen beside a separate entrance can be treated as closer to an accessory dwelling even when the cabinet run is short.
Every city works from its own ordinance and its own adopted code edition. The questions stay the same; the answers change at each city border. Utah basement apartment planning is a property-specific path, and no single approval turns every basement into a legal rental or ADU.
Before any rental plan, a homeowner should get answers from the city and from licensed design and trade professionals. A useful call covers four points.
- Confirm the municipality and the current code edition. Don't rely on a neighboring city's handout.
- Ask whether a second kitchen needs a covenant or a recorded document. Some cities want that paper filed with the permit set.
- Ask what the drawings must show. Room use, detectors, and egress are common items.
- Ask which inspections happen at rough-in and at final. Plumbing, electrical, mechanical, and building inspections often come in that order.
Measure the Room and Pick a Layout That Fits
The useful measurements are the ones people skip. Finished ceiling height, the stair, the egress window, support posts, duct bulkheads, and the furnace or water heater all steal space that a floor plan treats as open.
Murray's basement-finish checklist asks applicants to include a Second Kitchen Covenant when a kitchen is added, and it states that habitable rooms, including kitchens, generally need a ceiling height of at least 7 feet. Confirm that figure with the city before a soffit, a duct, or a dropped ceiling is framed. Drawings also have to name each room's use, show smoke and carbon monoxide detectors, and demonstrate emergency egress. A kitchen added in an already finished basement can face the same life-safety review when walls, plumbing, electrical work, or occupancy changes. Cabinets don't create a legal separate dwelling.
| Layout | Illustrative footprint | Best fit | Watch for |
|---|---|---|---|
| Single wall | About 8 to 10 feet of wall | Kitchenettes and wet bars | Limited storage and no second work zone |
| Galley | About 8 feet wide by 10 feet long | Narrow rooms with a clear end wall | Walkway must stay clear of stairs, doors and furnace access |
| L-shape | About 9 feet by 10 feet | Open rooms where living space wraps the kitchen | Corner cabinets need pull-out or swing-out storage to stay reachable |
| Peninsula or island | About 10 feet by 12 feet or larger | Full kitchens with room for seating | Needs walkway clearance and must not block the egress route |
Those footprints are planning examples, not code minimums. A common planning figure is about 42 inches of walkway for one cook and about 48 inches where two people pass. Those are design guidelines, not a universal rule.
A labeled room example
Say a household has a 12 by 18 foot unfinished area. The stair landing sits at one end and the furnace sits at the other. A galley fits on paper. It fails if the walkway crosses the stair or the clear space a technician needs at the furnace. An L-shape along the long wall can leave that path open. A peninsula only works if the remaining aisle still reaches the egress window. Ways to make a small basement feel larger don't replace that clearance.
Trace the path from the stair to the kitchen to the egress window with a tape measure before choosing a layout.
If that path bends around a post or a bulkhead, mark the obstruction on the plan. Moving the cooktop six feet is cheaper on paper than after the slab and the ceiling are closed.
Plumbing and Drain Routes That Set the Sink Location
Waste water runs downhill to the sewer, and that single fact does more to place the sink than any cabinet plan. The sink can only sit where a drain can reach the main line at a workable slope. If the basement floor sits below the sewer connection, a sewage ejector pump is often required. That pump adds cost, a basin in the floor, a power supply, and maintenance for as long as the kitchen stays in service.
A sink near the existing stack and water supply usually stays inside the framing. A sink on the far wall can mean cutting the slab or lowering a line under the floor. The dishwasher and disposal share that same drain and vent, so their location follows the sink, not the other way around. A long hot-water run from the water heater also means a long wait at the faucet unless a recirculation plan is part of the work. And wherever the lines end up, the furnace and water heater still need their service clearance left open.
A drain-first sketch
The first sketch put the kitchen across the room from the stack. That layout needed a new drain cut through the slab. Moving the sink six feet toward the stack kept the work inside the joist cavity. The counter got shorter. The slab stayed intact, and the ejector question went away because the line could still fall to the existing connection.
Before cabinets are ordered, it helps to check sink measurements before installation so the bowl, the faucet, and the drain align with the cabinet opening. A licensed plumber has to set pipe size, slope, and venting after seeing the house. Useful questions for that visit:
- Where does the drain leave the basement? That point sets how far the sink can move.
- Is an ejector pump required? Below-sewer floors usually need one.
- What is the vent route? A new sink still has to vent, not just drain.
- Which line changes need a permit? New plumbing in a basement finish commonly does.
Ventilation for Cooking in a Below-Grade Room
Cooking below grade is harder on the air than cooking upstairs. Moisture, odor, and particles stay in a room that may have little natural ventilation. Gas equipment adds combustion by-products to that same air. A hood that only stirs the air around doesn't solve it.
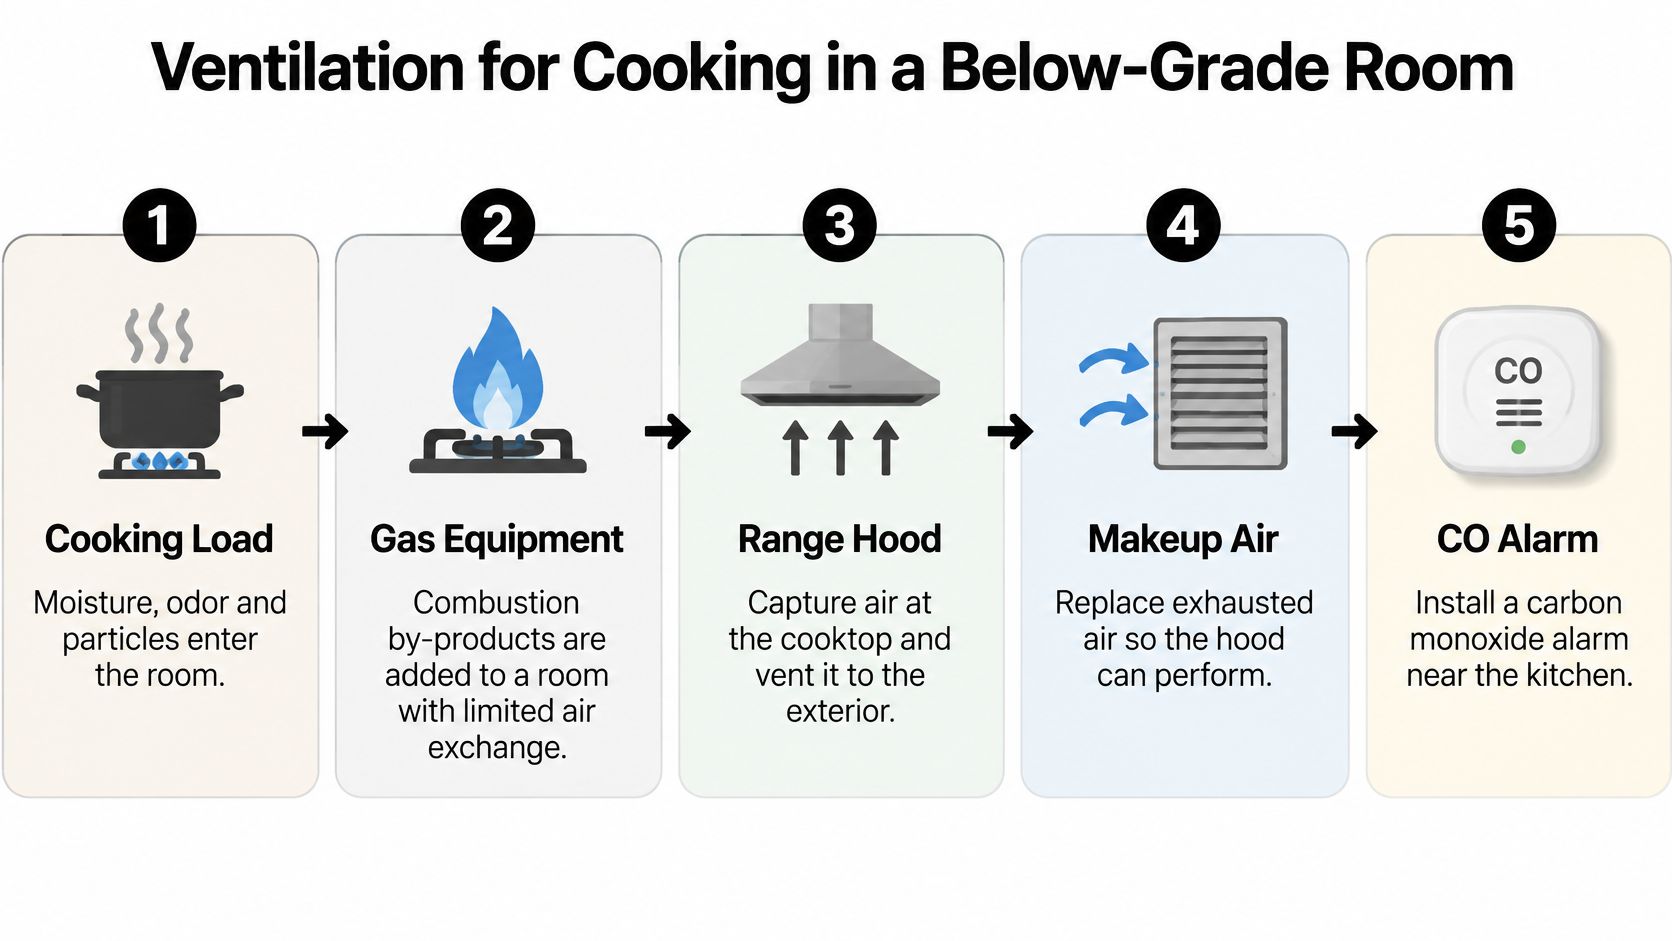
EPA indoor air guidance identifies approximately 100 cubic feet per minute as the typical target for a residential range, while continuous ventilation may instead be sized at five air changes per hour based on kitchen volume. Bigger isn't automatically better. The same guidance warns that larger exhaust fans can depressurize the house enough to cause backdrafting where a furnace, water heater, or fireplace uses combustion air. International Residential Code mechanical provisions state that ducts serving domestic cooking exhaust equipment may not terminate in an attic, crawl space, or another area inside the building. The route has to end outdoors. Utah's adopted edition should be confirmed, because those adoptions change.
| Exhaust option | How it works | Main trade-off |
|---|---|---|
| Ducted hood to exterior | Pulls cooking air through a duct to outdoors | Best for cooking; needs a wall or ceiling route and an exterior termination |
| Recirculating hood | Filters air and returns it to the room | Removes some grease and odor only; does not remove moisture or combustion gases |
| Downdraft vent to exterior | Pulls air down at the cooktop through a duct | Useful where a hood is not practical; long duct runs reduce airflow |
| Microwave with exterior vent | Vents the area above the microwave to outside | Limited capacity for range cooking; suits kitchenettes |
A planning sequence
Confirm the room volume, then compare the hood rating with the actual route, including elbows and length. Plan the duct before ceilings close, using smooth metal, few bends, and a sealed exit through the foundation or rim. Coordinate makeup air with the heating equipment so the hood doesn't fight the furnace. A cooktop under a bathroom or far from an outside wall needs a harder route than one on an exterior wall. Households who want cleaner air for cooking spaces still need that exterior discharge for a proper cooking hood. Run the hood while cooking and for 10 to 20 minutes afterward. A licensed mechanical contractor has to size the duct and the termination.
Electrical Circuits and GFCI Protection in a Basement Kitchen
Map every receptacle before cabinets and drywall go up. A late outlet means opening a finished wall or sliding a cabinet.
Utah's statewide electrical amendments state that GFCI protection applies to kitchen receptacles serving countertop surfaces. The same amendment limits the basement receptacle provision to unfinished portions or areas of the basement not intended as habitable rooms. In practice, every countertop outlet belongs on the plan, not only the ones beside the sink. Coffee makers, toaster ovens, and blenders need spots that match the backsplash, the cabinet height, and the appliance clearance.
High-load equipment
A basement kitchen typically takes four to six dedicated circuits, including a 240-volt circuit for an electric range. A dishwasher, a disposal, a microwave, and a refrigerator are commonly planned on separate circuits. Match the conductor and the breaker to the appliance nameplate, and confirm the final count with a licensed electrician against the adopted code. The state wording is a baseline. The local inspector's edition and reading still control. Because the work involves new circuits, it falls under the permits and inspections Utah expects on basement kitchen projects.
Rough-in versus trim-out
A receptacle moved at rough-in costs an electrician a few minutes. The same receptacle moved at trim-out means cutting a box through a finished backsplash, patching tile, and repainting the wall. Plumbing changes trigger the same problem: when a supply or drain line shifts mid-project, the outlets planned near the sink have to shift before drywall closes. Keep receptacles and junction boxes reachable, and keep them off the drip line under a supply, a drain, or an appliance connection when the layout allows.
The deliverable is a marked-up plan the electrician reviews before rough-in. In unfinished space, that plan has to sit with the new lighting, the plumbing penetrations, and the framing. In a finished basement, adding counter circuits can mean opening walls and pulling an electrical permit. Circuit size and protection stay with the licensed electrician.
Lighting, Storage and Reach in a Window-Limited Room
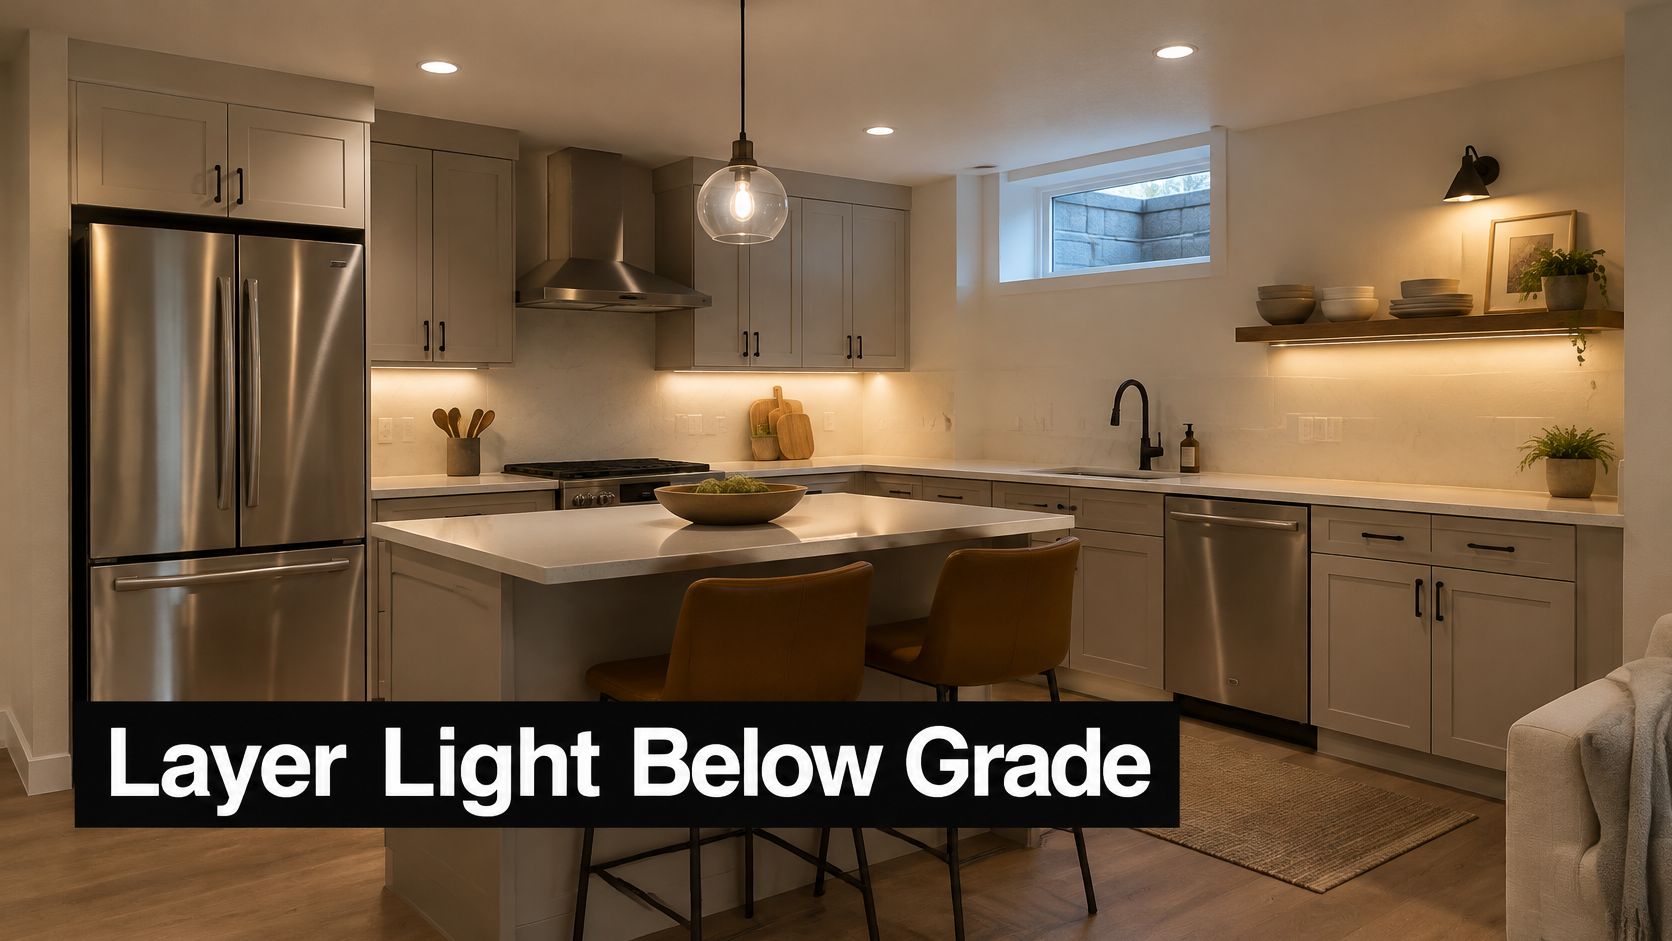
A basement kitchen rarely gets enough daylight, so the light has to arrive in layers. Ambient ceiling light covers the room. Task light under the upper cabinets covers the counters. A smaller accent layer keeps the room from feeling like a work bay when it doubles as family or guest space. Put a switch at each entry, and use dimmers where the room changes jobs through the day. Use 3000K to 3500K on wood and paint; treat that pick as a taste call, not a code value.
Storage fails when it is deep and low. Pull-out drawers beat a fixed shelf at the back of a base cabinet, and corner cabinets stay usable only with pull-out or swing-out hardware. The 2025 Houzz U.S. Kitchen Trends Study surveyed 1,620 homeowners who had recently completed, were undertaking, or planned a kitchen renovation, a general kitchen sample rather than basement projects alone. Half reported addressing special household needs, including 26% responding to current age-related needs and 35% anticipating future needs. Among those households, pullout cabinets were used by 62%, additional lighting by 55%, and wide drawer pulls by 50%.
A labeled reach example
A guest kitchenette had one high upper cabinet, and an older visitor could not reach the shelf. Lowering that shelf and adding a pull-out bin at counter height fixed the daily use without a second cabinet run. The same fix costs least at rough-in, when blocking, wiring, and floor choices are still open.
- Blocking for grab bars where a future user may need a steady hold.
- Nonslip flooring on a surface that sees sink spills.
- Rounded edges on corners that sit in the walkway.
- Clear circulation that doesn't cross the stair or the egress path.
Who uses the kitchen decides how far to take this list. A family kitchenette can stop at dimmers and pull-outs; a rental-ready or in-law space earns the blocking, the nonslip floor, and the wider pulls before the walls close. Homeowners who explore lighting options for finished basements can place those layers before the ceiling closes. Adding them after the cabinets and wiring are done costs more and leaves fewer choices.
Confirm the Planning Order Before You Request an Estimate
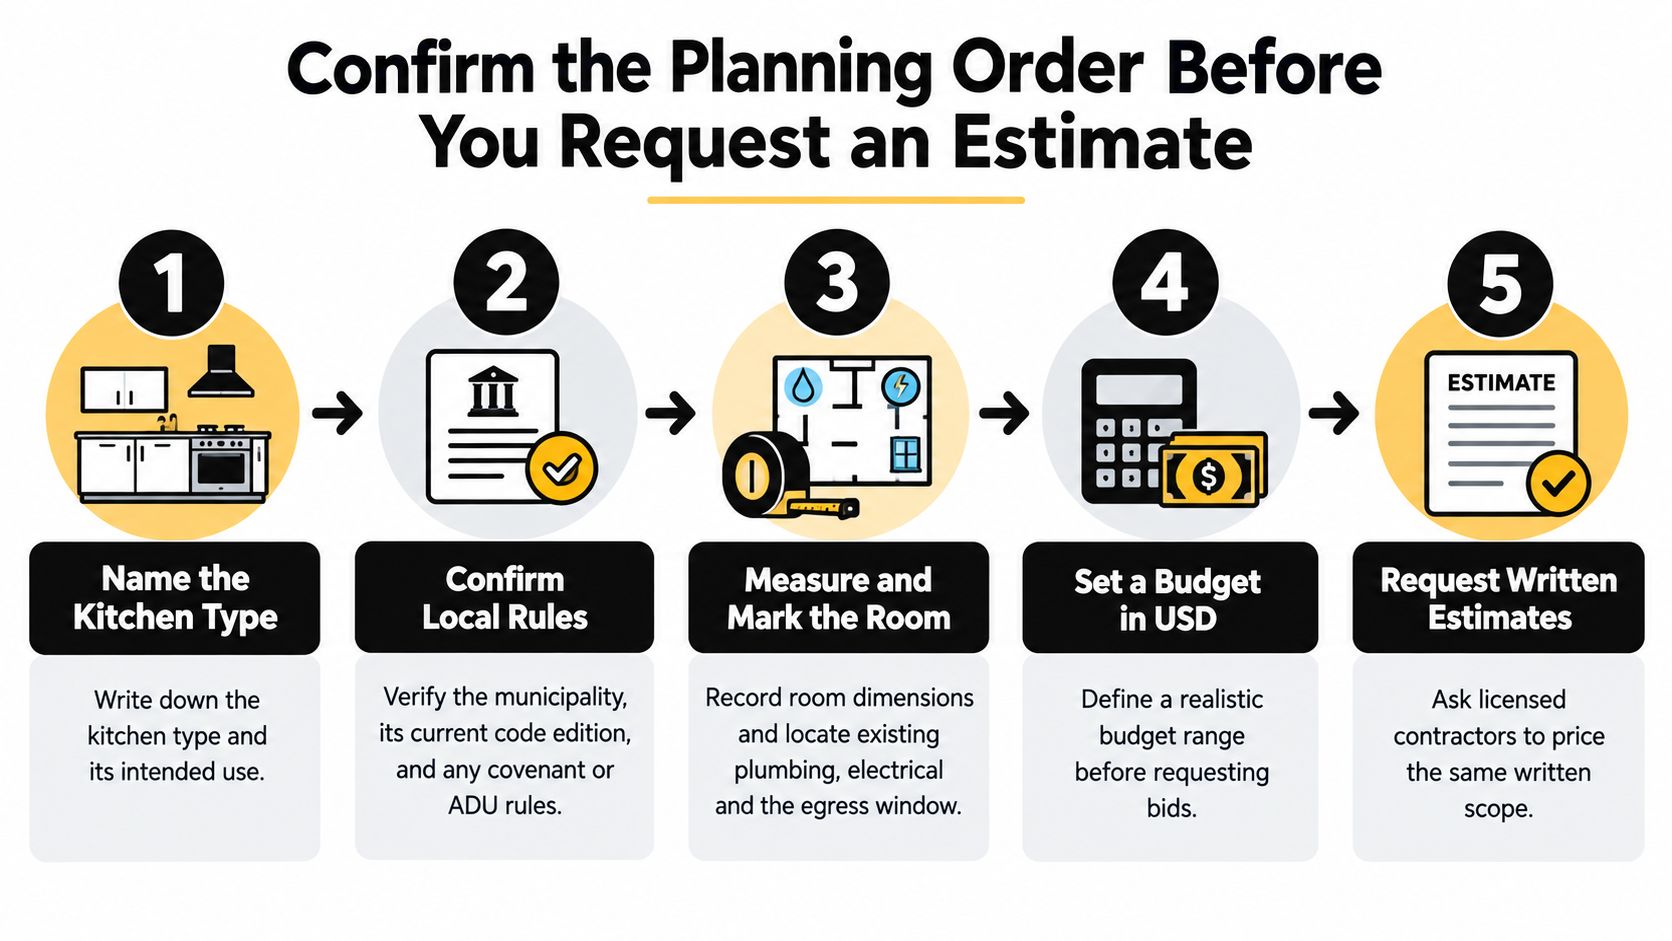
The working order is short, and skipping a step usually shows up as a change order.
- Name the kitchen type and its intended use in writing.
- Confirm the municipality, its current code edition, and any covenant or ADU rules. Utah basement permit requirements are a starting point, not a substitute for the city's current sheet.
- Measure the finished ceiling height, the stair, the egress window, the posts, and the mechanical equipment.
- Choose the layout that keeps the walkway and the egress path clear.
- Route the drain and the exterior exhaust before the ceilings close.
- Map every countertop receptacle and high-load circuit with the electrician.
- Plan the light layers, the storage, and the reach features at rough-in.
- Confirm the approval path before any rental or occupancy plan.
One family worked that list top to bottom and ran into the true limiting factor at the end. Stating the use up front, a kitchenette for guests instead of a rentable suite, kept their application to plumbing and electrical permits only. The city required those permits issued before rough-in work started, and the rough-in inspections had to pass before the new ceiling could close. The drawings went in once, matching the use on the form, and nothing later had to be reopened.
A basement-focused builder walks, measures, and plans the space before a realistic budget is discussed, then coordinates the trades on the kitchen work. The kitchen process runs through needs assessment, design and selection, construction, and inspections and completion. A cost guide or calculator is planning guidance, not a bid. Scope and exclusions set any range, and no timeline is guaranteed. A free on-site estimate is the right next step once the kitchen type and the city rules are written down.
Homeowners in Salt Lake, Utah, Davis, and Weber counties can use that order to see whether the room is a wet bar, a kitchenette, a full kitchen, or a possible separate suite, whether the work is part of a full basement finish or a remodel of finished space. Request a free on-site estimate through Utah Basement Finishing and walk the basement before any layout is locked.